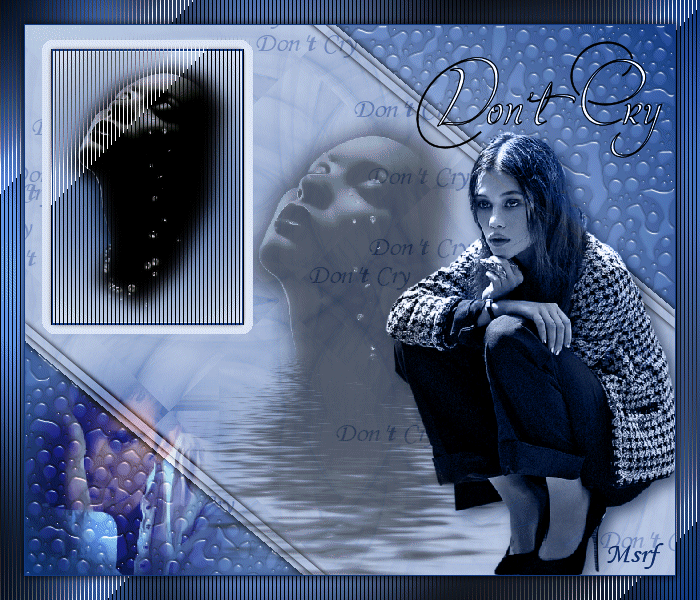
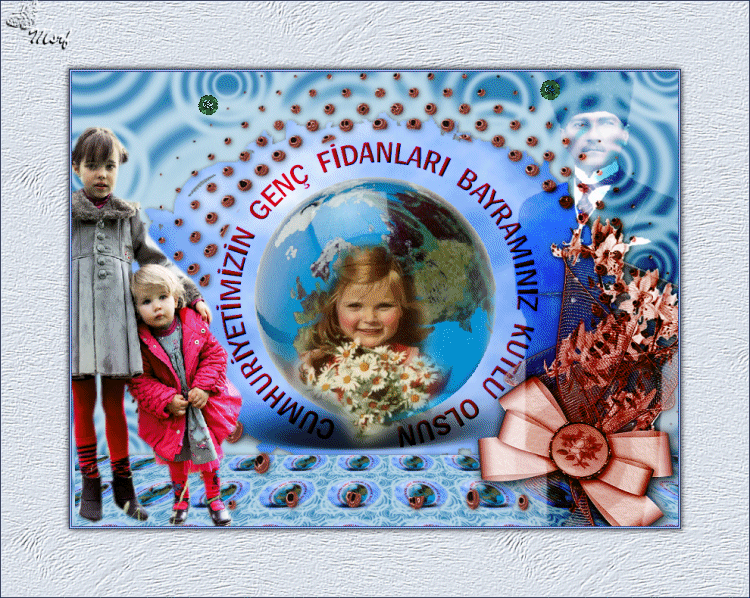
Don’t Cry
Plugins:
Simple- Pizza Slice Mirror
Filter Factory Gallery J – Drink to Me
Mura’s Meister- Copies
Ulead Effects- GIF-X 2.0
Tramages Tow The Line
Grafic Plus- Cross Shadow
Tubes:
Woman tube: Hazal
Anothers: Unknown
Thank you very much
This Tutorial Made with PSP 9
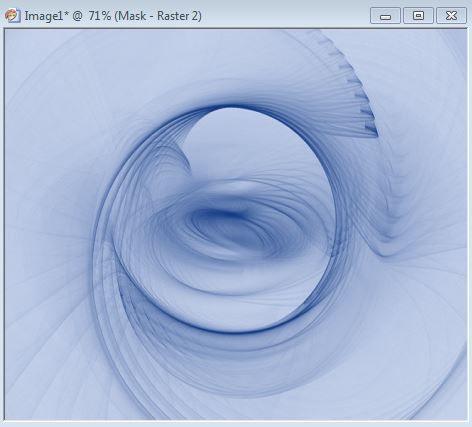
Open material file, open mask file and put it in your psp
mask file, open preset file and double click on, whide the program is open.
Now Starting
Foreground color: #dae3f6 , Background color: #0f3883
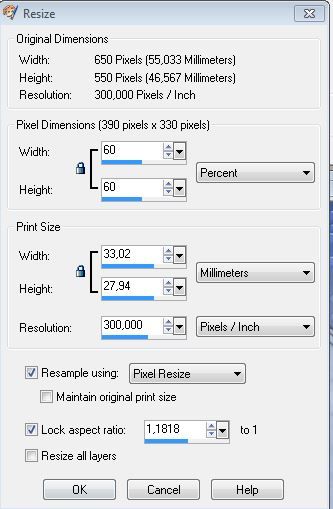
1-
File- New image- open New Layer transparant, 650 x 550
2-
Fill #dae3f6
3-
Layers - New Raster Layer and Fill #0f3883
4-
Layers - New Mask Layer - Narah_mask_Abstract99,
Layers - Merge - Merge Group
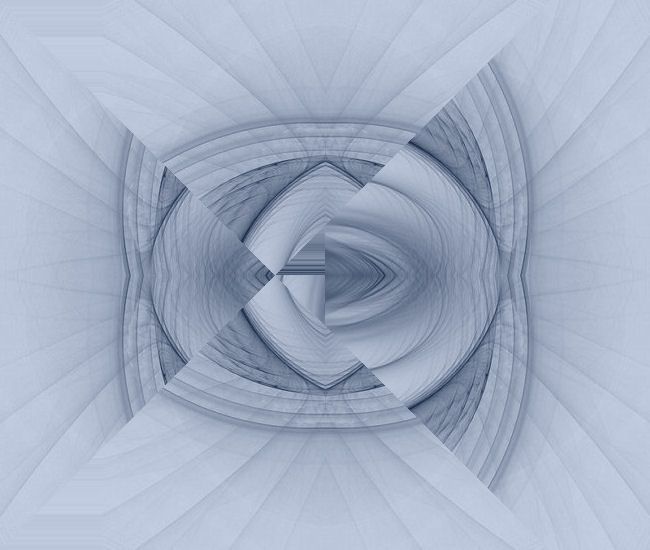
5-
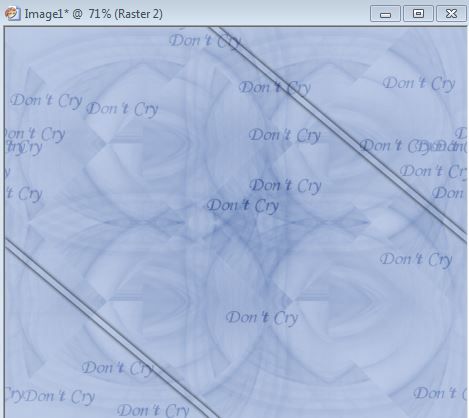
Effects - Edge Effects – Enhance
6-
Effects- Plugın- Simple- Pizza Slice Mirror
7-
Merge Visible
8-
Effects- Plugıns- Filter Factory Gallery J –
Drink to Me
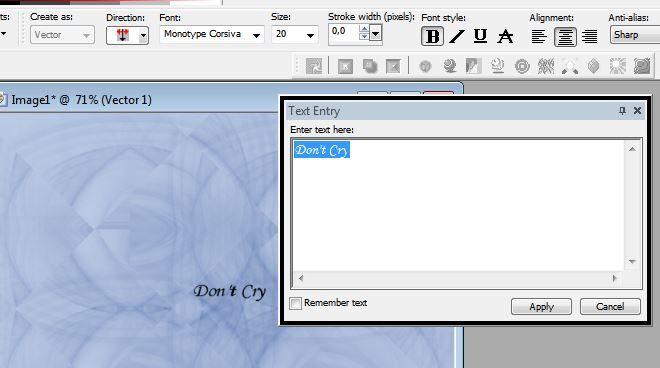
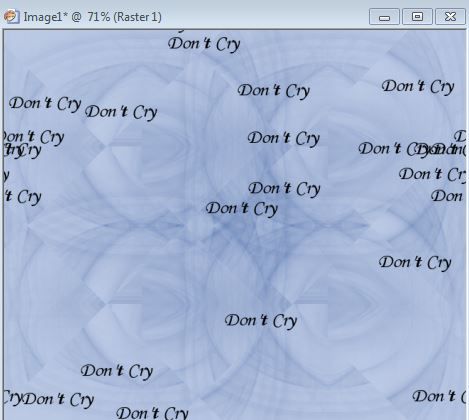
9-
Text Tool and write “Don’t cry “ for background
and after Convert to Raster Layer
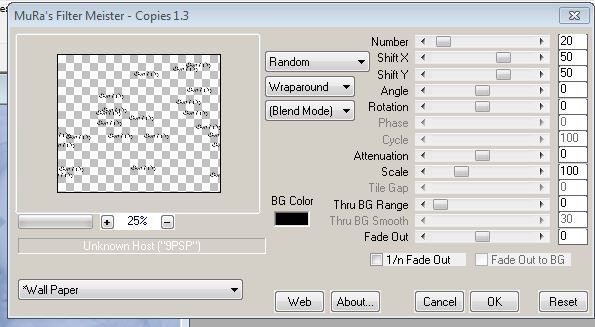
10-
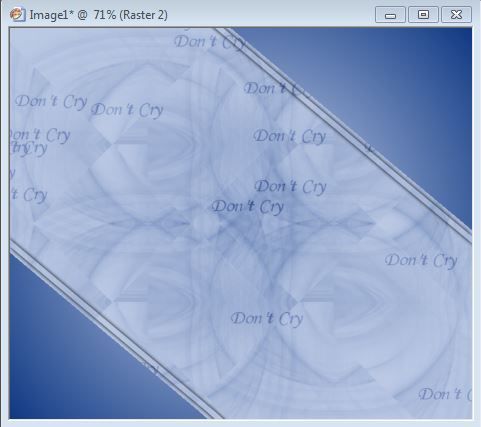
Effects- Plugins- Mura’s Meister- Copies
11-
Blend mode ayarını: Softlight
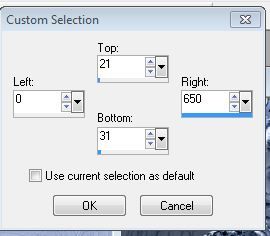
12-New raster layer, Custom selection:
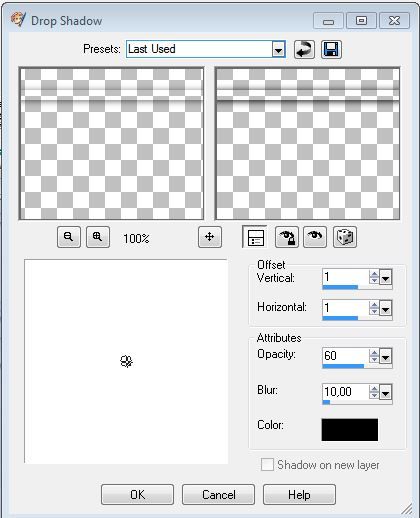
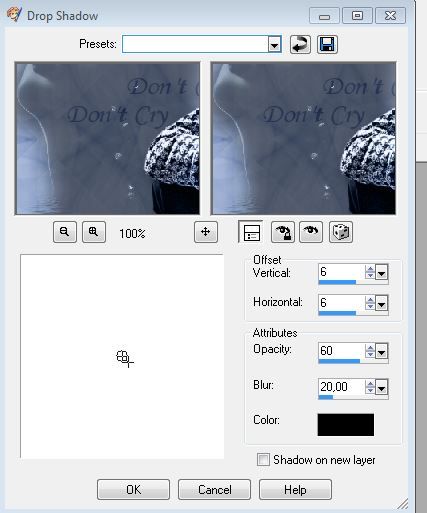
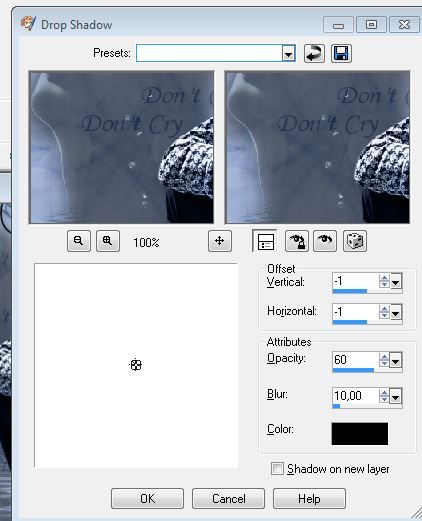
13- No fill color.
Effects- 3D effecst- Drop Shadow, twice.
14-
Selections- Select None
15-
Effects- Geometric effects- Skew
should be such that
16-
Layers – New Raster Layer and click on the top fight and bottom left corners with Magic Wand tool
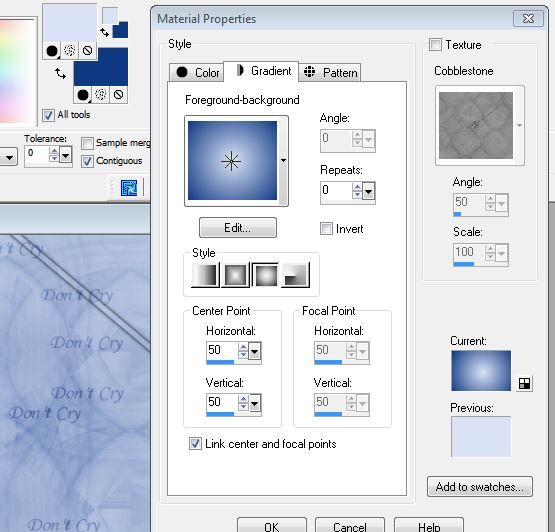
16-
Fill gradient
17-
Selections- İnvert, Effects – 3D effects- Drop
Shadow, twice,
18-
Selections- Select None
19-
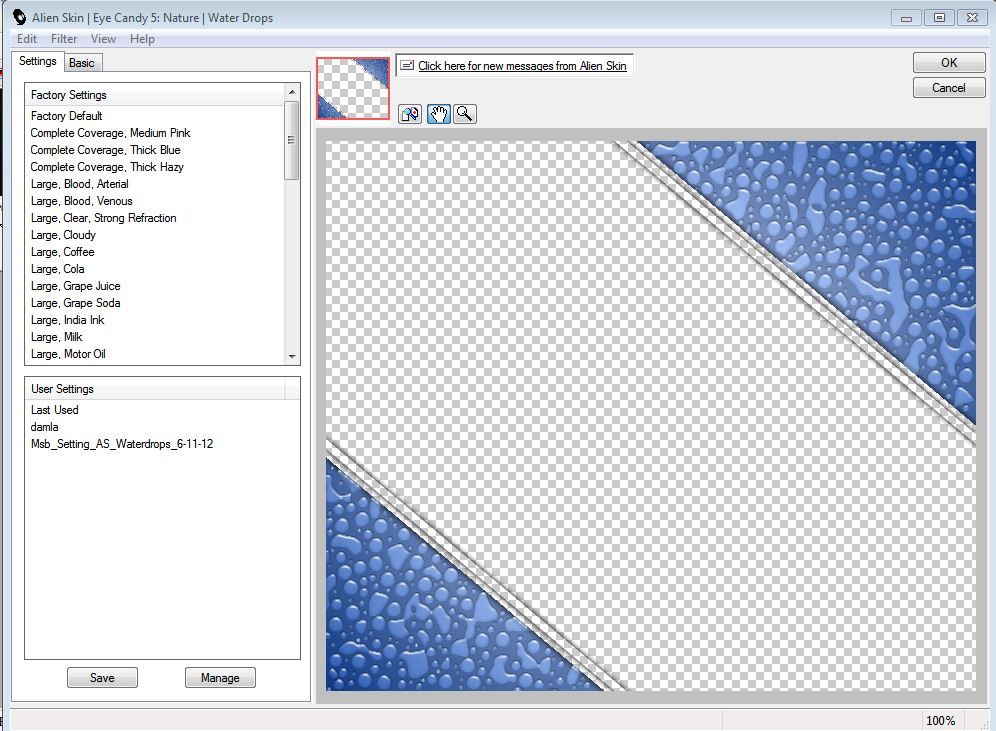
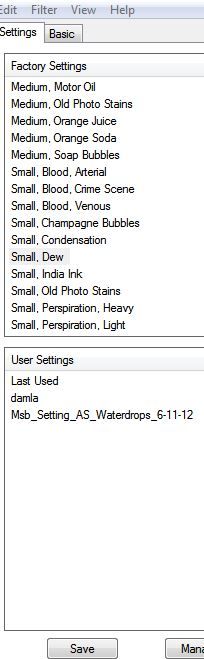
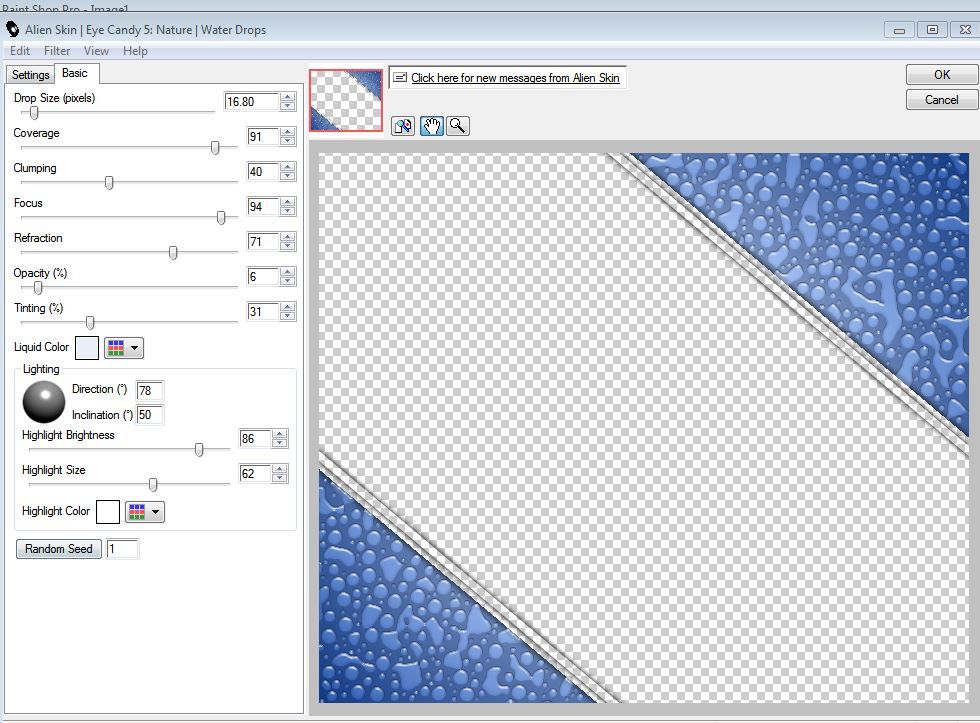
Actived top layer , Effects- Plugins- Alien skin
Eye Candy 5- Nature- water Drops, select from user settings: “ damla” preset and OK
or apply the
following settings
20-
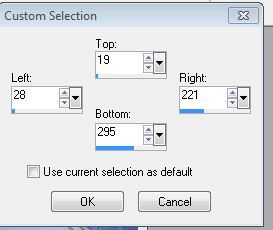
Layers – New Raster Layer, Selection tool- Custom
selection
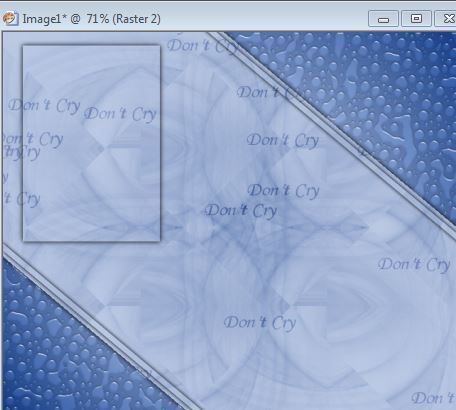
21-
Effects- 3D effects- Drop shadow, twice like 13 and 17.
should look like
22-
Fill dark background color,
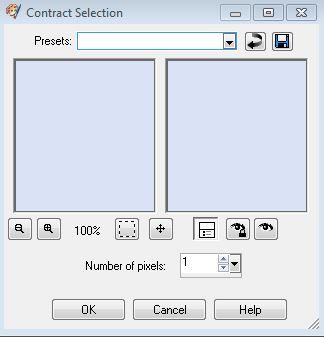
Selections- Modify-
Contract 2 pixel, fill light foreground color,
again Selections- Modify- Contract
1 pixel, fill gradient
23-
Open and copy woman face tube, Paste into Selection
24-
Selections- Select None
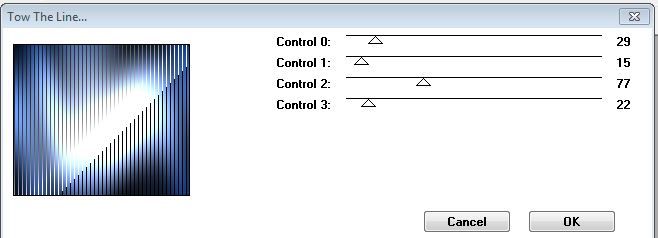
25-
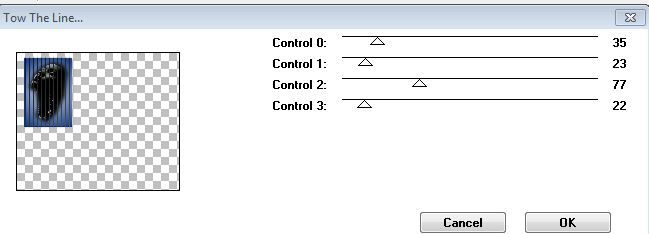
Effects- Plugins- Tramages Tow The Line
26-
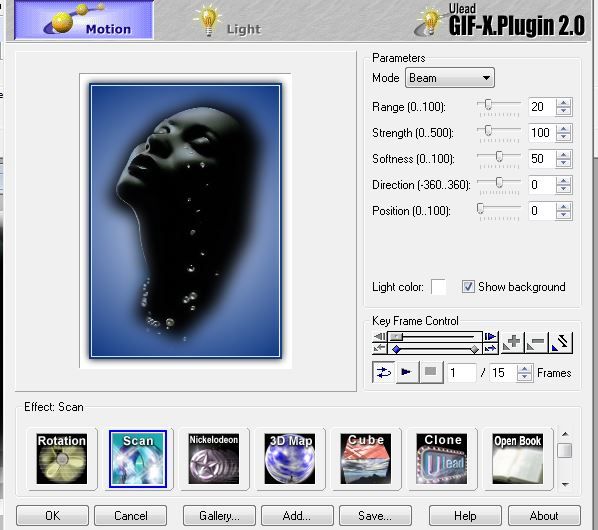
Actived top layer , Effects- Plugins- Ulead
Effects- GIF-X 2.0, scan
27-
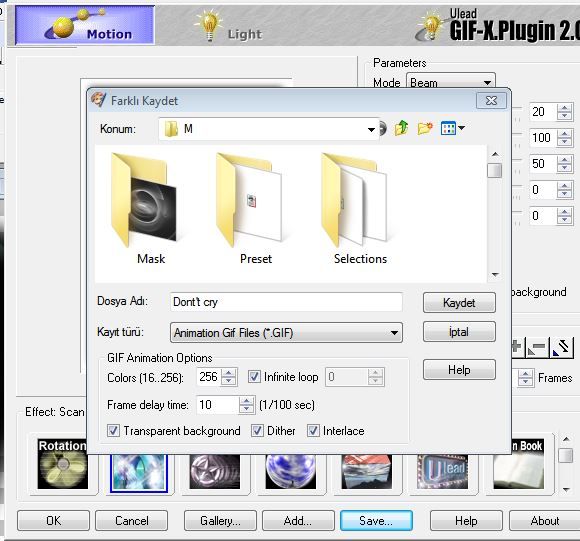
Save, gif and
close effect
28-
Top layer, again
woman face tube, copy, paste as new layer, İmage, resize % 60,
Opacity:
% 50
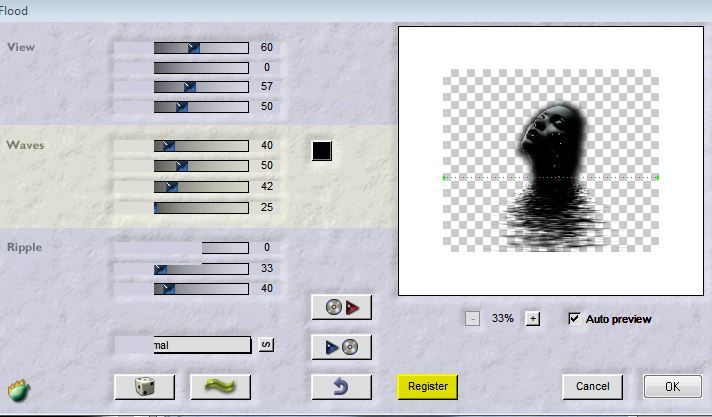
29-
Effects- Plugin- Flaming Pear- Flood
30-
Actived top layer, open Man face tube, copy,
paste as new layer, image Resize % 60, pull the letf corner with Raster Deform Tool
31-
Blend mode: Overlay, Opacity 82
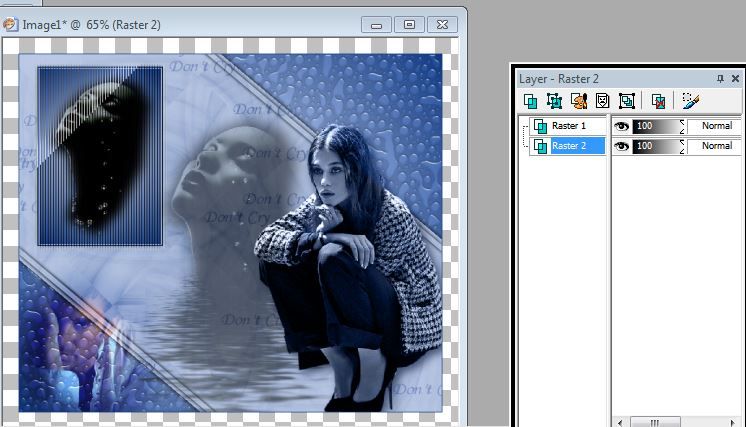
32-
Open Woman tubes 75_ Hazal, copy, paste as new layer,
image resize % 80,
pull the right corner with Raster Deform tool,
33-
Effects- 3D- Drop Shadow
34-
Blend mode- Luminance Legacy
35-
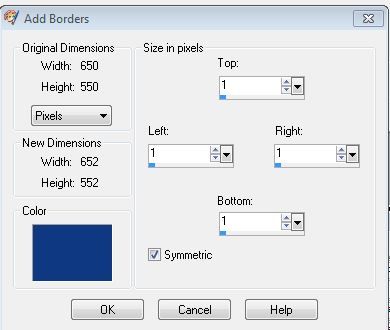
İmage-
Add Borders 1 pixel, with dark background color.
36-
Click right on the Background layer- Promate
Background Layer.
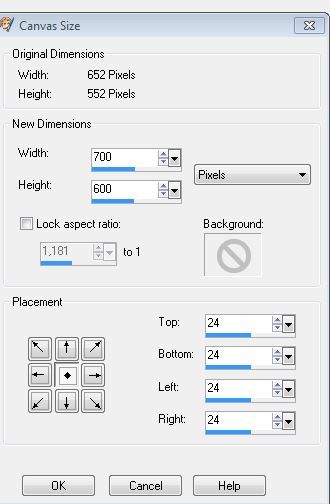
37-
İmage- Canvas Size, Width: 700 Height: 600 pixel
38-
Layers – New Raster Layer, Arrange- move down
39-
Actived bottom layer, fill gradient
40-
Effects- Plugins- Graphics Plus- Cross Shadow
41-
Effects- Plugin- Tramages- Tow the Line
42-
Actived top layer, Effect 3D Effects- Drop
Shadow, twice
43-
Open text tube “ Don’t Cry “copy, paste as new
layer
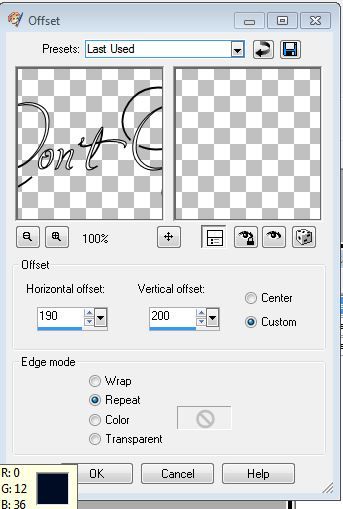
44-
Effects- İmage effects- Offset
45-
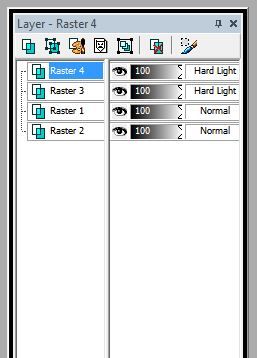
Blend mode Hardlight
46-
Add your watermarkt
47-
layers of the moment such as:
48-
Merge Visible
49-
Save as Psp ( Animation shop)
50-
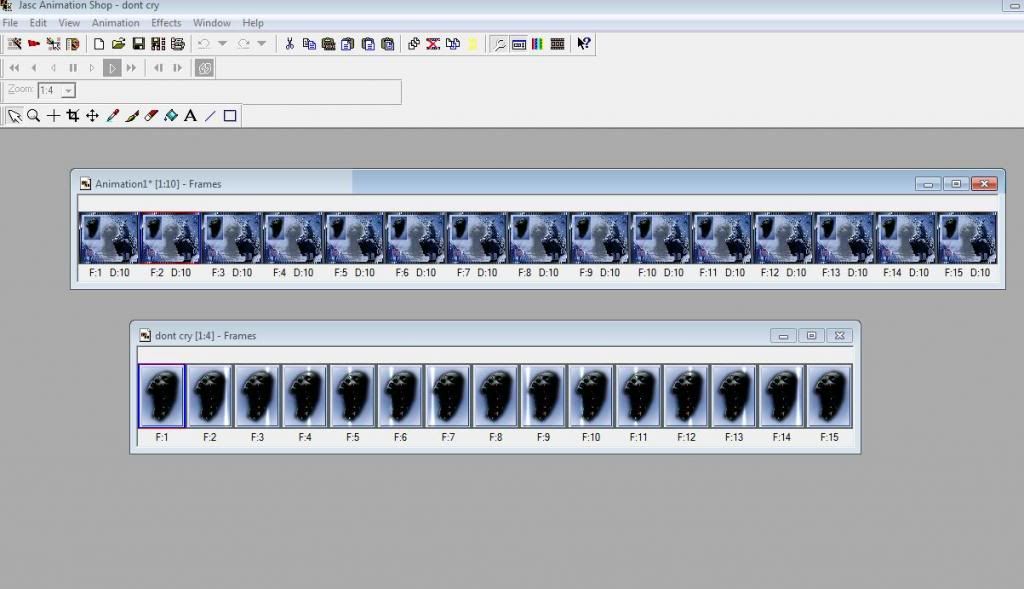
Open your Animation Shop, Open the finished work
and your little gif before finished 27. Step
51-
Gif is 15 frame, please dublicated your main work, Edit- Duplicate selected
, (15 frame should be)
52-
Top main work, click to first frame, Edit- Edit
all
53-
Bottom gif, click on the first frame, Edit- Edit
all / and now click to first frame and pull up to my main( top main work) first
frame , into little frame …
54-
View Animation
55-
Save as gif
I hope you enjoy
Your versions:
Teşekkürler Hazal
Teşekkür ederim Tamer
Teşekkürler Ahmet
Teşekkürler Nesli
Teşekkür ederim Nazlı
Teşekkürler Hena/Zeynep
Thank you Eva
Thank you Katinka
Teşekkürler Umut
Teşekkürler Umut
Thank you Angela
Thank you Celine
Thank you Geertje
Thank you Truus
Thank you Pinuccia
Thank you Pinuccia
Thank you Rasta Marley
Thank you Jeanne