You are always on my mind
Msrf Designs
Glitter, circular text and mask works
Preview:

The First step: First preparation
1- File- Open New İmage 720 x 720 Transparent
2- Fill with #f8f4e0 (light color)
3- New raster layer ( Raster 2)
fill with #e1c3b4 (dark color)doldurun
fill with #e1c3b4 (dark color)doldurun
4- Open Mask

Layers-new mask layer-from image
İnvert mask data must be checked

Mask will be like this:

Now, click on the Raster 2
5- Layers- New mask layers- from image
5- Layers- New mask layers- from image
Find the mask
İnvert mask data must be unchecked
İnvert mask data must be unchecked
OK.

Merge group
6-Adjust-Sharpness- Sharpen more
Our first preparation phase is over.
Come on, let's continue
Come on, let's continue
The Second step: Circular text
1-Elipse tool ( kısa yol: Q )


Click the circle mark in the menu above
Create on vector must be checked !
Draw a circle, moves upward from the lower left red arrow.
(Wiil be printed on the left side of mause )
You must draw a circle as shown in photo bilow.
(Wiil be printed on the left side of mause )
You must draw a circle as shown in photo bilow.

2- Vector 1 so keep
open new raster layer: (Raster 2)
open new raster layer: (Raster 2)

3-Text tool
Start from where you can see red arrow and then type the text what you want...
( With dark color. I wrote with this color:
Start from where you can see red arrow and then type the text what you want...
( With dark color. I wrote with this color:

I wrote with this color: #951114
* İf you want to change the location to divide the text, click there...
and

Click on the spacebar


Cick on the Vector 2
Layers-convert to raster layer

(Now, has become the Raster 3 (As you can see in the picture below)

5-Delete Raster 2 and Vector 1
Now, you have only three layers (As you can see in the picture below)

6-Open woman tube
Copy-paste as new layer on the Raster 3
7-İf you want you can resize with
İmage-resize
(Maybe you do not need resize)
(I use this): percent 70
7-İf you want you can resize with
İmage-resize
(Maybe you do not need resize)
(I use this): percent 70

8-Move the tube a little to the left ( or move to another location)
Make it how you want !
Make it how you want !
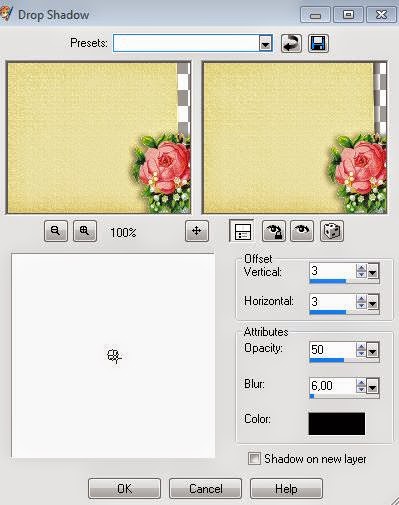
9-Effects- 3D effects- Drop Shadow

10-Open the parchment paper
11-Copy-paste as new layer
12- İmage-Resize 50
12- İmage-Resize 50

13- Move a little to the right ( or move to another location)
.14-Effects- 3D effects- Drop Shadow
Make it how you want !
15- Type the text what you want.
( I use this font: Fiolex girl-size 30)
Add your name or your watermarkt
16-Let's now frame
17-İmage-Add borders- 1 px. #951114 dark color

18- İmage-Add borders- 15 px. #f8f4e0 light color

19-İmage-Add borders-1 px. #951114 dark color

Frame is over.
İf you are ready let's continue to the next step
The third step: Gold Glitter Frame
( There are Gold1 / SG8 / SG7 Glitters in the material file)
You can work with you want...
You can work with you want...
1-Magic wand tool

Make the following settings

2- Click inside the outer light-colored frame
3- layers-dublicate twice

3- layers-dublicate twice
4-Click the bottom layer (Background)
Close the eyes of the upper layers.
5- Now,open your program:Jasc Animation Shop
Open the SG 8 adlı glitter gif ( in your material life)
İt is three-framed:
İt is three-framed:

6- Click on the first frame
Edit-copy
Go back to the PSP (Jasc Paint Shop Pro 9)
Click a blank area
7- Paste as new image
İt was İmage 1
You can see in the picture below:

You can see in the picture below:
8-Click there

Now, click on the pattern
Click here on the little black arrow

9-Find image-1 named glitter frame
Make the following settings and
OK.

Make the following settings and
OK.
10-Angle: 45 Scale: 100 and OK.

11-Fill the bottom frame with
Flood fill tool

You can see below:

12-Now, delete the image 1 named glitter frame
Let's continue
13-Go back to Jasc Animation Shop
14- Edit-Copy the 2.frame of ( SG8)
Go back to the PSP (Jasc Paint Shop Pro 9)
Click a blank area
15- Paste as new image
İt was İmage 2
16- Now, open the eyes of the middle layer
Close the eyes another layes.
Close the eyes another layes.

17- Click on the Pattern and find image 2 named glitter frame, click and
OK.
OK.

18-Fill the middle frame with
Flood fill tool
19- Delete İmage 2
20-Again, go back to Jasc Animation Shop
21- Edit-copy the 3.frame of ( SG8)
22- Go back to the PSP (Jasc Paint Shop Pro 9)
Click a blank area
23- Paste as new image
23- Paste as new image
İt was İmage 3

24-Open the eyes of the top layer
Should be closed to the eyes of the others layer

Should be closed to the eyes of the others layer
25- Click on the Pattern and find image 3 named glitter frame, click and
OK.
26-Fill the top frame with
OK.
26-Fill the top frame with
Flood fill tool
27- Delete İmage 3
28- Selections-Select none 
Now, we must carry these three layers to the
Jasc Animation shop
Jasc Animation shop
29-Click the bottom layer and open eyes,close another layers.

30- Edit-copy yaparak
31- Go to the Jasc Animation Shop
Click a blank area
32-Edit-Paste as new animation
33-Return to the PSP ( Jasc Paint shop pro 9)
34- Open the eyes of the middle layer, close the eyes of another layers35- Edit-Copy

35- Go to the Jasc Animation Shop
Click the first frame and
36- Edit-paste-After current frame 
We had two frame

37-Return to the PSP (Jasc Paint shop pro 9)
Open the eyes of the top layers eye close the eyes of another layers 38- Edit-copy

39- Go to the Jasc Animation Shop
40-Click the second frame and
41- Edit-paste-After current frame

We had almost three frame and we're done

42-Click the buton and watch the animation ( you see in the picture below)
( Click the same buton to stop)
43-You can save as gif if you like.
44- File-Save as
Gif
Gif


This is my result:

( Use this pattern setting if you are going to use SG7 Angle: 0 Scale: 100 )
I hope you enjoy
October 2014
Müşerref Özdaş ( Msrf)
My works with another glitter gif in the material file)


My some works with alternative material 2 file)


İf you wish you can dress up your works with different effects and sparkle.

My friends version:

Thank you Jasmin